How to Clean a Canvas Roof Top Tent? The Right Way
You just got back from a ripper trip, and your canvas roof top tent looks like it wrestled a red dirt road and lost. Left uncleaned, that grime, moisture, and mould will quietly destroy the fabric and waterproofing you paid good money for. Cleaning a canvas roof top tent the right way isn’t complicated, but the details matter:
- Brush off loose dirt before any water touches the fabric
- Scrub gently with a canvas-safe cleaner and lukewarm water
- Rinse thoroughly until absolutely no soap residue remains
- Never use bleach or harsh detergents – they strip the waterproofing
- Air dry completely in the sun before folding and packing away
- Re-waterproof with a DWR treatment after every deep clean
Use the wrong product, skip the drying step, or store it even slightly damp, and you’re inviting mould, leaks, and costly damage. This guide covers everything – the right tools, safe cleaning products, mould removal, re-waterproofing, and proper storage, so your tent stays tough and ready for the next adventure.
What Do You Actually Need Before You Start Cleaning?
Getting the right gear together before you start makes the whole job easier. Cleaning a canvas RTT without proper tools is like trying to wash your car with a tea towel. You’ll either damage the fabric or just shuffle the dirt around. I’ve done both, and neither ends well. The canvas-specific cleaner is your most important purchase here.
Generic household cleaners are pH-aggressive and dissolve the DWR coating that keeps you dry overnight. A soft-bristle brush matters just as much. Hard brushes slowly tear the canvas weave and weaken the fabric over repeated cleans. Spend a little upfront on the right gear. Your tent will reward you with years of solid performance.
| Tool / Product | Usage | Approx. Price (AUD) |
|---|---|---|
| Canvas-safe cleaner (e.g. Nikwax Canvas Wash) | Cleans canvas without stripping DWR coating | $20 – $30 |
| Soft-bristle scrub brush | Scrubs fabric without damaging fibres | $8 – $15 |
| Garden hose with gentle spray nozzle | Rinses canvas panels thoroughly | $15 – $40 |
| Two clean buckets | Keeps cleaning solution and rinse water separate | $5 – $10 |
| Microfibre cloths | Wipes seams, corners, and zippers dry | $5 – $12 |
| White vinegar (for mould) | Natural mould treatment safe for canvas | $3 – $6 |
| DWR re-waterproofer (e.g. Grangers Tent Repel) | Restores water repellency after deep cleaning | $25 – $40 |
Should You Remove the RTT From the Car to Clean It?
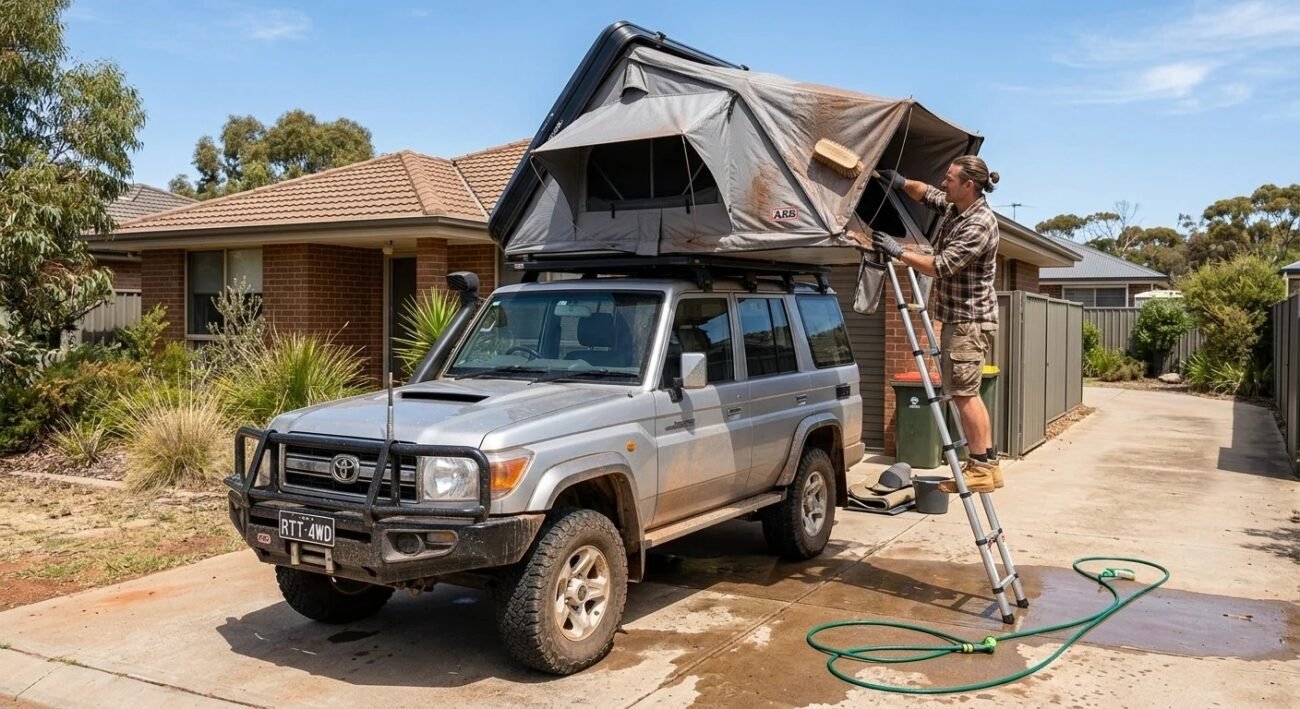
Honestly, for a basic clean, you do not need to remove the tent at all. I clean mine on the vehicle about 80% of the time. A simple rinse and scrub with the tent pitched open in the driveway takes around 30 minutes.
The ladder gives you easy access to every panel. A garden hose handles most of the surface dirt without drama. For a deep clean, mould treatment, or full re-waterproofing job, getting it off the car makes everything significantly easier. You can lay the canvas flat, work the seams properly, and dry it on the ground without risk.
If you drive a lifted 4WD, spending an extended session working above roof height gets tiring and awkward fast. My personal rule is straightforward. Basic clean, leave it mounted. Deep clean or mould treatment, take it down. Working at ground level gives you better control and a more thorough result every time.
How Do You Do a Basic Clean After Every Trip?
Most RTT owners skip the post-trip clean because they are tired and just want to get home. That is completely understandable. But leaving dust, moisture, and bird droppings sitting on canvas between trips is exactly how small problems become expensive ones. A basic clean takes around 20 to 30 minutes. It does not require any special products or a full tent removal. Done consistently after every trip, it adds years to your canvas lifespan.
The most important thing to understand here is sequence. Water before brushing pushes dry dirt deeper into the canvas weave. Always dry brush first, then introduce water. That one habit alone prevents most of the stubborn staining that leads people to unnecessary deep cleans.
Step 1: Set the tent up fully in your driveway Pitch it open completely. Cleaning a folded or half-open tent misses seams, corners, and inner panels where moisture hides.
Step 2: Dry brush the entire canvas surface Use a soft-bristle brush to sweep off loose dust, dirt, leaves, and debris. Work from the top panels downward. Always brush before any water touches the fabric.
Step 3: Check the canvas closely before rinsing Look for bird droppings, tree sap, insect residue, or early mould spots. These need targeted treatment before a general rinse. Rinsing over dried bird droppings without pre-treating just locks them in.
Step 4: Pre-treat any stubborn spots Apply a small amount of canvas-safe cleaner directly to stained areas. Let it sit for five minutes before touching it with water.
Step 5: Rinse with a gentle garden hose Use a soft spray setting. Work from the top of the tent downward so dirty water runs away from already-clean sections. Never use a jet nozzle directly on canvas or seams.
Step 6: Mix your cleaning solution Add a small amount of canvas-safe cleaner to a bucket of lukewarm water. Never use hot water as it causes canvas to shrink and weakens seam stitching over time.
Step 7: Scrub with a soft-bristle brush Work the cleaning solution across all canvas panels in gentle circular motions. Pay extra attention to seams, entry points, and the underside panels near the base.
Step 8: Rinse thoroughly until the water runs completely clear Leftover soap residue is one of the fastest ways to degrade DWR waterproofing. Rinse longer than you think is necessary. Then rinse once more.
Step 9: Wipe down zippers and poles with a damp cloth A quick wipe removes grit from zipper tracks before it causes binding or corrosion. Takes less than two minutes and saves zipper replacements.
Step 10: Leave it fully open to air dry in direct sunlight Do not fold it down until the canvas is completely dry to the touch, including all seams and corner folds. On a warm Australian day, four hours of direct sun is usually enough.
| Action | Why It Matters |
|---|---|
| Pitch tent fully open | Ensures full access to every panel and seam |
| Dry brush first | Prevents dirt being pushed deeper into fibres by water |
| Inspect for spots | Targeted treatment works better than general rinsing alone |
| Pre-treat stains | Breaks down residue before general cleaning begins |
| Gentle hose rinse | Softens surface dirt without forcing water into seams |
| Mix canvas-safe solution | Protects DWR coating while cleaning the fabric |
| Soft scrub | Cleans without tearing canvas weave or abrading fibres |
| Full rinse | Removes all soap residue that degrades waterproofing |
| Wipe zippers and poles | Prevents corrosion and zipper binding between trips |
| Full sun dry | Eliminates residual moisture that causes mould in storage |
How Do You Deep Clean a Canvas RTT That’s Badly Soiled?
A deep clean is a different job entirely compared to a basic post-trip rinse. You are dealing with embedded dirt, set-in stains, potential mould, and degraded waterproofing all at once. I recommend scheduling a full deep clean at least once a year, or immediately after any particularly rough trip through mud, red dirt country, or sustained wet weather.
After a week-long trip through the Gibb River Road in the wet season, my old Darche needed a proper deep clean before it ever went back into storage. Surface rinsing was not enough.
The biggest mistake people make with a deep clean is rushing through it in a single afternoon. A proper deep clean including drying time takes a full day minimum. Try to squeeze it into two hours and you will end up packing the canvas away with residual moisture trapped inside the layers. That is a guaranteed mould problem within a few weeks.
Step 1: Remove the RTT from the vehicle
For a genuine deep clean, take the tent off the car. Working on the ground gives you proper access to every surface, seam, and underside panel. Trying to deep clean a canvas RTT at roof height on a lifted 4WD is awkward and you will miss areas.
Step 2: Pitch the tent fully open on a flat clean surface
Set it up in a well-lit area with good drainage. A concrete driveway or a clean grassed area works well. Avoid gravel surfaces as small stones scratch the canvas base when you are working around it.
Step 3: Dry brush the entire tent thoroughly
Spend proper time on this step. Use a stiff dry brush to remove all loose soil, leaf matter, and surface deposits before any water is introduced. For red dust from outback tracks, you may need to brush multiple times.
Step 4: Pre-soak heavily soiled sections
For thick mud, embedded red dirt, or set-in grime, apply lukewarm water and let it soak into the fabric for 10 minutes. This softens compacted dirt without aggressive scrubbing that damages fibres.
Step 5: Apply canvas-safe cleaner to all panels
Mix Nikwax Canvas Wash or Grangers Tent and Gear Cleaner with lukewarm water following the product label ratio. Apply it generously across the entire canvas surface, not just the dirty sections.
Step 6: Work seams and stitching lines carefully
Use a soft toothbrush or narrow detailing brush to clean along every seam line. Seams collect dirt, moisture, and mould spores in the stitching channels. A wide scrub brush cannot get into these areas properly.
Step 7: Tackle specific stains with targeted treatments
| Stain Type | Treatment | Method |
|---|---|---|
| Bird droppings | Warm water soak first, then canvas cleaner | Soak 10 minutes, then soft scrub. Never dry scrape as it tears fibres |
| Tree sap or eucalyptus resin | Small amount of eucalyptus oil on a cloth | Dab gently, do not rub aggressively across the canvas |
| Red dust (Outback dirt) | Multiple rinse cycles, canvas cleaner soak | Requires patience and multiple applications, not aggressive scrubbing |
| Mud and clay | Full pre-soak, then scrub once softened | Never scrub dry mud as it abrades fibres deeply |
| Mould and mildew | White vinegar 1:1 with water, 20 minute soak | Follow full mould removal steps as a separate process |
| General grime | Canvas-safe cleaner solution | Standard scrub and rinse method |
Step 8: Rinse with a low-pressure garden hose, top to bottom
Rinse every panel thoroughly. Tilt the tent to help water drain away from lower panels as you go. Work systematically from the highest point downward so clean rinse water does not run over already-dirty sections.
Step 9: Second rinse to remove all soap residue
Run a second full rinse after the first. Soap residue left in the fibres attracts dirt faster and degrades DWR waterproofing significantly. This step is not optional on a deep clean.
Step 10: Clean poles, base, ladder, and hardware
Wipe down all aluminium poles and the base frame with a damp cloth. Check all ladder rungs and mounting points for surface rust or corrosion. A thin application of lanolin-based protector on metal components prevents long-term corrosion.
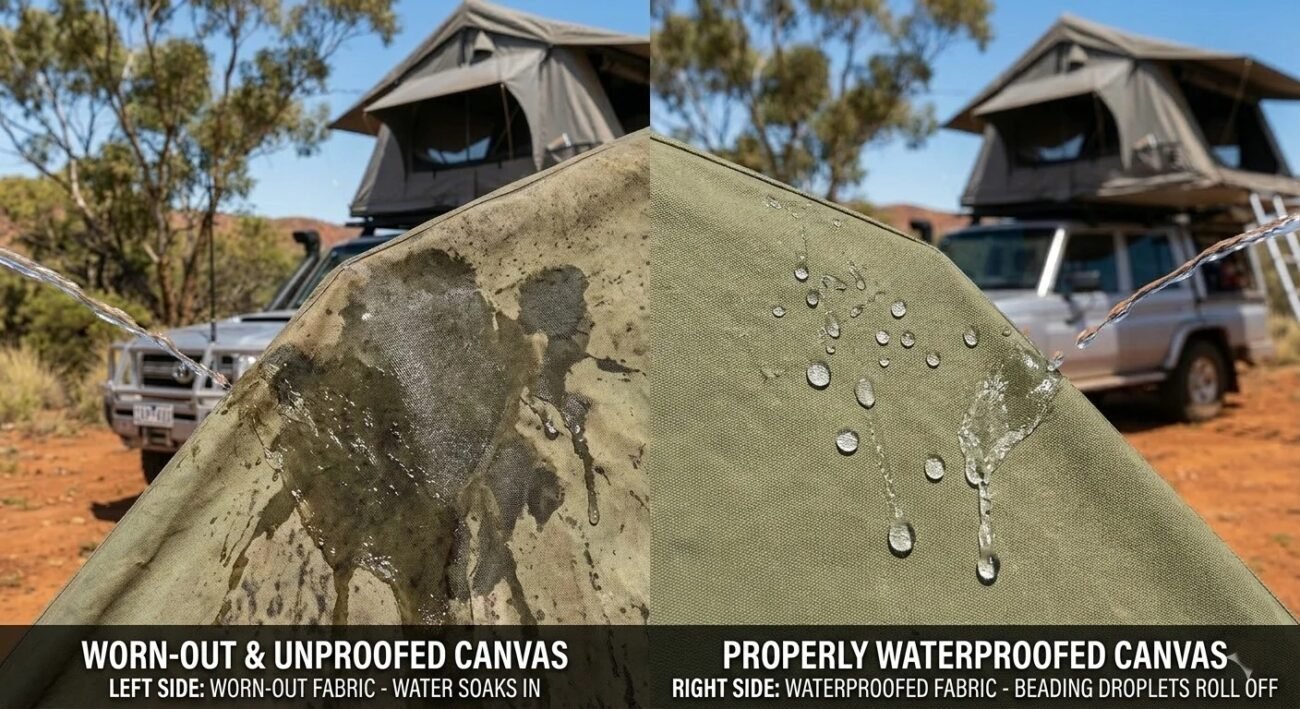
Step 11: Perform the bead test on the canvas
Once the canvas is clean and beginning to dry, spray a small amount of water onto several different sections. If water beads up and rolls off cleanly, the DWR coating is still intact. If water soaks in and the fabric darkens, re-waterproofing is required before the tent goes back into service.
Step 12: Apply DWR re-waterproofer while canvas is still slightly damp
Products like Nikwax Tent and Gear SolarProof and Grangers Tent Repel both work best applied to damp canvas rather than completely dry fabric. Apply evenly across all panels and pay particular attention to seam lines where waterproofing fails first.
Step 13: Dry fully open in direct sunlight for a minimum of six to eight hours
A deep clean means more moisture has penetrated deeper into the canvas layers. It needs significantly longer drying time than a basic clean. Do not rely on feel alone. Seams and folded corners can hold moisture long after the flat panels feel dry. Press your hand firmly into every fold and corner to check for coolness or dampness before packing down.
Step 14: Store loosely in a breathable bag in a ventilated space
After a full deep clean, fold the canvas loosely rather than compressing it tightly. Store it in a breathable cotton or canvas bag rather than a sealed plastic container. A ventilated shed or garage space is ideal.
How Do You Remove Mould and Mildew From a Canvas RTT?
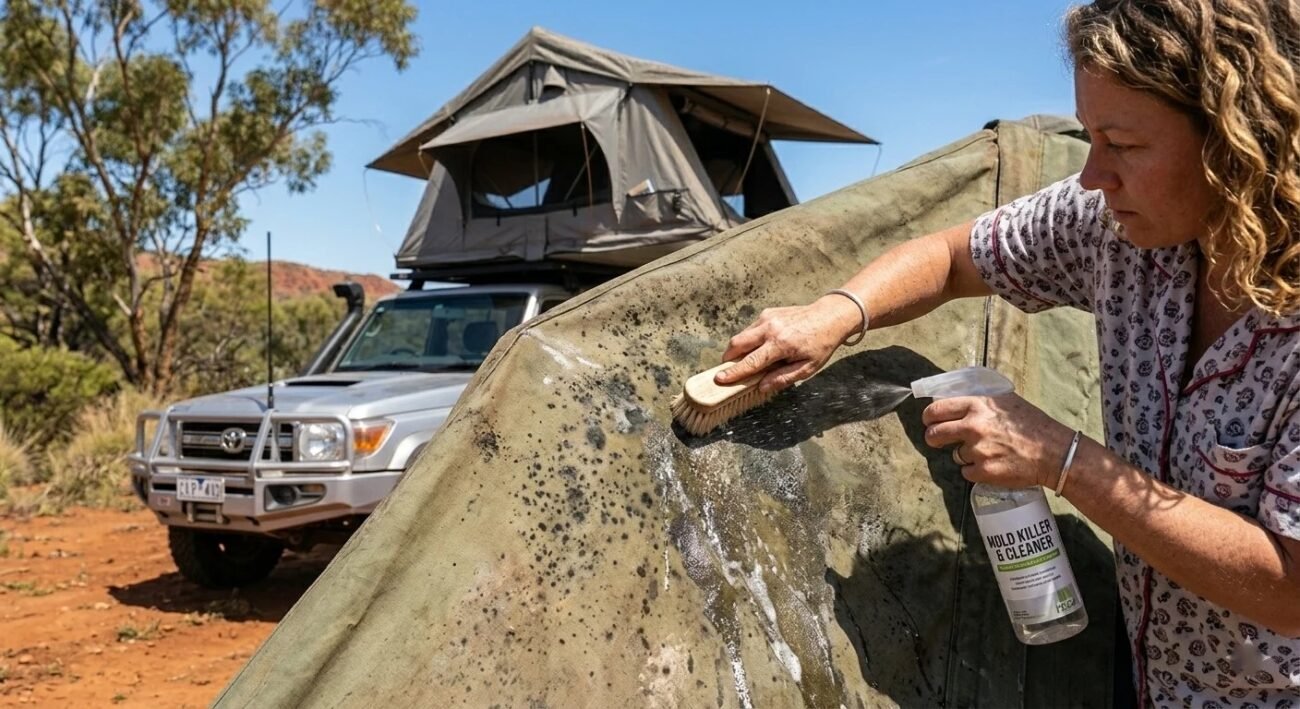
Mould is the most common problem RTT owners deal with in Australia, especially after wet season trips in Queensland or the Northern Territory. The good news is that early-stage mould is completely treatable at home. I have saved tents that looked like science experiments. Follow these steps carefully and your canvas will come out clean.
- Step 1: Set the tent up outside in direct sunlight Never brush mould spores off indoors. Spores spread instantly in enclosed spaces.
- Step 2: Dry brush the surface mould off first Use a stiff dry brush to remove loose spores. Always brush away from your face and body.
- Step 3: Mix a white vinegar solution Combine equal parts white vinegar and water in a spray bottle. This is safe, cheap, and effective.
- Step 4: Spray the affected areas and wait Saturate the mouldy sections with the vinegar mix. Let it sit for 15 to 20 minutes minimum.
- Step 5: Scrub gently with a soft-bristle brush Work in circular motions. Do not scrub aggressively as this pushes mould deeper into the fibres.
- Step 6: Rinse thoroughly with a garden hose Rinse until the vinegar smell is fully gone and the water running off is completely clear.
- Step 7: Dry in full direct sunlight, fully open The canvas must be 100% dry before packing. Sunlight naturally kills remaining mould spores.
- Step 8: Re-waterproof the treated area Mould treatment strips DWR coating. Apply a canvas-safe re-waterproofer once the tent is bone dry.
What Products Should You Use (and Which Ones Will Ruin Your Canvas)?
Product selection is where most people cause permanent damage without realising it. I have seen expensive canvas RTTs ruined by nothing more than a bottle of dishwashing liquid or a single application of bleach. Canvas looks tough from the outside, but the DWR coating sitting on top of the fibres is incredibly sensitive to harsh chemicals.
That coating is not woven into the fabric permanently. It is a surface treatment that aggressive cleaners dissolve on contact. Once it is gone, water soaks straight through the canvas instead of beading off. Products like Nikwax Canvas Wash are pH-balanced specifically to clean the fabric without touching the coating. That is why they cost more than a bottle of Palmolive, and the difference is absolutely worth paying for every single time.
| Product | Type | Benefit |
|---|---|---|
| Nikwax Canvas Wash | Canvas-specific cleaner | pH-balanced, preserves DWR coating fully |
| Grangers Tent + Gear Cleaner | Canvas and nylon cleaner | Eco-friendly, safe on all tent fabrics |
| White vinegar diluted 1:1 with water | DIY mould treatment | Natural, affordable, effective on early-stage mould |
| Grangers Tent Repel | DWR re-waterproofer spray | Quickly restores water repellency after cleaning |
| Nikwax Tent and Gear SolarProof | UV and waterproof protector | Adds UV protection alongside DWR restoration |
| Bleach | AVOID | Permanently destroys DWR and breaks down canvas fibres |
| Harsh laundry detergent | AVOID | Strips waterproofing and causes premature canvas failure |
| Petrol or kerosene | AVOID | Instantly dissolves fibres and coating on contact |
Does Cleaning Strip the Waterproofing on Canvas?
Yes, it does. Not always dramatically after one wash, but every clean puts wear on the DWR coating. The more aggressive the cleaner, the faster it degrades. Most first-time RTT owners do not realise this until their tent starts leaking after a wash. I learned it the hard way on a Kimberley trip after using regular car wash soap on my old Darche.
By day two in the rain, the canvas was absorbing water instead of shedding it. The DWR coating sits on top of the canvas fibres. It is not permanently built into the weave. Heat, UV exposure, dirt abrasion, and especially soap all break it down gradually over time. The bead test tells you exactly where you stand.
After cleaning, spray a little water onto the canvas surface. If it beads up and rolls off cleanly, the coating is still working properly. If it soaks in and the fabric darkens, you need to re-waterproof immediately. Always apply a DWR treatment like Nikwax Tent and Gear SolarProof or Grangers Tent Repel after every deep clean.
How Do You Clean the Zippers, Mattress, and Other RTT Components?
The canvas gets all the attention, but zippers, foam mattresses, and flooring need just as much care. Neglect the zippers and they will jam or corrode at the worst possible moment. Skip the mattress and you will sleep on a surface covered in dust and mould spores. Follow these steps during every full clean.
- Step 1: Dry brush the zipper teeth first Use an old toothbrush to scrub embedded grit out of the zipper teeth. Grit is the number one cause of zipper failure.
- Step 2: Wipe zipper tracks with a damp microfibre cloth Run a damp cloth along both sides of each zipper track. This removes fine dirt the brush misses.
- Step 3: Lubricate the zippers properly Apply beeswax or a product like Gear Aid Zipper Lubricant directly to the teeth. Never use WD-40 or oil-based products. They attract dirt and gum up the mechanism over time.
- Step 4: Remove and hand wash the mattress cover If the cover is removable, hand wash it with mild detergent and cold water. Air dry it fully before putting it back.
- Step 5: Baking soda treatment for the foam Sprinkle baking soda evenly across the foam base. Leave it for one hour to absorb odours, then brush or vacuum it off thoroughly.
- Step 6: Wipe down poles, the base, and any aluminium components Use a damp cloth with a small drop of mild soap. Dry everything immediately afterwards to prevent surface corrosion.
How Should You Dry and Store a Canvas RTT After Cleaning?
Drying and storage is the most overlooked step in RTT maintenance. More canvas tents are ruined in storage than out in the field. The rule is simple. If there is any doubt, dry it longer. I always give mine a full clear day in direct Australian sunlight before folding it away. Follow these steps and you will never deal with storage mould again.
- Step 1: Pitch the tent fully open Do not try to dry it half-open or partly folded. Open it completely so air moves freely through every panel and seam.
- Step 2: Position it for maximum direct sunlight Move the car or reposition the tent so as much canvas as possible is in direct sun. Aim for a minimum of four to six hours on a warm day.
- Step 3: Rotate or adjust shaded panels midway through Check which sections are in shade after a few hours. Rotate or reposition so every part of the canvas gets direct sun exposure.
- Step 4: Press your hand against seams and corner folds If any area feels cool or slightly damp to the touch, it needs more drying time. Do not rush this step.
- Step 5: Store the canvas loosely, not tightly compressed A tight fold traps residual moisture inside the layers. Store the canvas in a loose, relaxed fold inside a breathable bag.
- Step 6: Keep it in a dry, well-ventilated space Avoid sealed plastic tubs, airtight containers, or poorly ventilated sheds. A breathable cotton or canvas storage bag is the best option available.
How Often Should You Clean a Canvas Roof Top Tent?
There is no single answer that fits every camper, but there is a sensible schedule that works well for Australian conditions. The right frequency depends on where you travel, how often you go out, and what weather you encounter on the road. After every trip through dusty, muddy, or wet conditions, do a basic rinse and wipe-down.
This takes around 20 minutes and stops dirt setting permanently into the canvas fibres. Red dirt from the Pilbara or the Simpson Desert is particularly abrasive. Do not let it sit on the canvas between trips.
Every two to three months for regular users, do a proper scrub with a canvas-safe cleaner and check carefully for early mould. Once a year, schedule a full deep clean covering mould treatment, zipper maintenance, and a re-waterproofing application.
If you camp in tropical Queensland or the Northern Territory during wet season, clean after every single trip. Humidity in those regions accelerates mould growth faster than anywhere else in the country.
What Are the Most Common Mistakes People Make When Cleaning Their RTT?
After years of using rooftop tents and talking to other overlanders across Australia, the same mistakes keep coming up. Most of them are easy to avoid once you understand why they cause damage. None of these are minor slip-ups either. Several of them cause permanent, irreversible damage to canvas.
Mistake 1: Using bleach or harsh household detergent This instantly strips the DWR waterproofing and weakens canvas fibres over time. There is no recovery from repeated bleach exposure.
Mistake 2: Packing the tent away even slightly damp This is the single biggest cause of mould in rooftop tents. Even a small amount of residual moisture creates the perfect mould-growing environment inside a sealed tent.
Mistake 3: Skipping the re-waterproofing step after cleaning Every deep clean degrades the DWR coating. Most owners skip the re-treatment step and then wonder why their tent leaks on the next rainy night.
Mistake 4: Using a pressure washer at full power High-pressure water forces its way into seams and destroys stitching from the inside. Always use a gentle garden hose setting instead.
Mistake 5: Spraying insect repellent near the canvas DEET in insect repellents dissolves DWR coatings on contact. Keep all sprays well clear of the fabric during and after application.
Mistake 6: Storing the tent under a non-breathable tarp Wrapping a canvas RTT tightly in plastic sheeting traps moisture and creates a perfect mould incubator. Always use a breathable cover or storage bag.
Best Roof Top Tents in 2026 For Australians
Choosing the right rooftop tent in 2026 comes down to your budget, vehicle setup, and how seriously you take your camping trips. The Australian market has grown significantly over the past few years.
There are more solid options available now than ever before. After comparing multiple setups across different price points, one tent genuinely stands above the rest for serious Australian overlanders this year.
The Rigdup 1.8m Hard Shell RTT ticks every box that matters. It combines an aerodynamic hard shell design, integrated solar panel, Anderson plug power setup, and a quality memory foam mattress into one well-priced package. The 260cm ladder is perfectly suited to lifted 4WDs, which is the most common setup on Australian tracks.
The aluminium honeycomb base adds structural strength and insulation without unnecessary weight penalty. At $3,400, it competes directly with imported tents selling for $4,500 or more. For build quality, included features, and value in the current market, nothing else at this price point comes close.
| # | Tent | Type | Price (AUD) | Why It Stands Out | Best For | Verdict |
|---|---|---|---|---|---|---|
| 🏆 | Rigdup 1.8m Hard Shell RTT | Hard Shell | $3,400 | Integrated solar panel, Anderson plug, aluminium honeycomb base, YKK zippers, 260cm ladder, 40mm memory foam mattress, aerodynamic shell | Overlanders, 4WD tourers, couples, lifted vehicles | Winner: Best overall value in the 2026 Australian market |
| 2 | Rigdup 1.4m Soft Shell RTT | Soft Shell | $3,200 | 320gsm ripstop poly-cotton canvas, 70mm memory foam mattress, solar integration, Anderson plug, YKK zippers | Solo travellers, lightweight setups, budget-conscious buyers | Excellent: Best soft shell value from Rigdup |
| 3 | ARB Simpson III | Soft Shell | $3,800 – $4,200 | Proven Australian brand, extremely durable canvas, widely available service network | Hardcore outback travellers, ARB loyalists | Good: Premium Australian brand, higher price point |
| 4 | iKamper Skycamp Mini | Hard Shell | $4,500 – $5,000 | Compact design, quick setup, high-quality materials | Couples, SUV owners, frequent travellers | Good: Premium option, significantly higher cost |
| 5 | Darche Eclipse 1400 | Soft Shell | $2,800 – $3,200 | Australian-owned brand, solid canvas construction, competitive pricing | Families, weekend campers, budget-friendly buyers | Good: Reliable entry-level option from an Australian brand |
| 6 | Thule Tepui Explorer Ayer 2 | Soft Shell | $3,000 – $3,500 | Strong brand reputation, clean design, decent canvas quality | Casual campers, touring couples | Overall: Solid performer but lacks the features Rigdup includes at this price |
| 7 | Bundutec Roadrunner | Hard Shell | $4,800 – $5,500 | Premium hard shell, fast opening, excellent weather sealing | Serious expedition travellers, frequent wet-weather campers | Overall: Top-tier quality but priced significantly above the Rigdup |
Wrapping Up
Your Canvas RTT Will Last – If You Treat It Right
A canvas roof top tent is one of the most worthwhile investments you can make as an overlander. But it only stays that way if you look after it properly. I have owned and cleaned multiple RTTs over the years, and the ones that have held up best were never the most expensive. They were the ones that got consistent, proper care after every trip.
The core message from everything covered in this guide is simple. Use canvas-safe products only. Rinse out every trace of soap. Never pack the tent away damp. Re-waterproof after every deep clean. And build a basic cleaning routine into every single trip, not just the big annual service.
Australian conditions are genuinely tough on canvas. Red dirt from the Pilbara, humidity from the Top End, eucalyptus sap from every bush campsite in between – your canvas faces a lot. Giving it 30 minutes of care after each trip is the difference between a tent that lasts five years and one that lasts fifteen.
If you are unsure where to start, grab a bottle of Nikwax Canvas Wash and a soft-bristle brush. Set the tent up in your driveway this weekend and work through the basic clean steps. That single habit will protect your investment better than anything else you can do. Got questions about your specific tent or a stubborn stain? Drop them in the comments below. Explore our detailed guide for all tips on installing, setting up, and maintaining rooftop tents.
FAQs
No, never machine wash canvas RTT fabric. The agitation damages canvas fibres and destroys the DWR waterproof coating permanently. Always hand wash using a soft brush, canvas-safe cleaner, and lukewarm water. Rinse thoroughly and air dry completely in direct sunlight.
A musty smell means mould or mildew is already growing inside the canvas. Treat with a white vinegar and water solution at equal parts. Spray, leave for 20 minutes, scrub gently, then rinse well. Dry fully in direct sunlight before storing.
Only at very low pressure settings and from a safe distance. High-pressure water forces itself into seams, breaks stitching, and strips waterproofing quickly. A standard garden hose with a gentle spray nozzle is always the safer and more effective option.
On a warm Australian day, allow at least four to six hours of full sun exposure for a basic clean. After a deep clean, give it a full day minimum. Always press seams and corner folds firmly to check for hidden moisture before packing down.
Yes, DWR waterproofing naturally degrades from UV exposure, dirt abrasion, and cleaning. Do the bead test regularly. Spray water onto the canvas surface. If it soaks in instead of beading off, apply a DWR re-waterproofer like Grangers Tent Repel or Nikwax SolarProof immediately.
Never store the tent even slightly damp. Always dry it fully in direct sunlight before folding. Use a breathable cotton storage bag, never plastic. After trips through humid regions like Queensland or the Northern Territory, clean and dry the tent before it goes back on the vehicle.
Eucalyptus oil works specifically for removing tree sap and resin stains on canvas. Apply a small amount to a cloth and dab gently onto the stain only. Do not apply it broadly across the canvas as it can affect the DWR coating if used in large quantities.