How to Take Off a Roof Top Tent by Yourself? Solo Removal Tips
Ever stared up at your rooftop tent and thought, “There’s no way I’m getting that down alone”? You’re not the only one.
The good news is – yes, you absolutely can take off a roof top tent by yourself, safely and without wrecking your car or your back. Most rooftop tents weigh between 30–60 kg, so the trick isn’t brute strength – it’s smart technique. Strip out the mattress first to cut the weight.
Use ratchet straps to control the descent. Prep a clear landing zone before you touch a single bolt. With the right steps, solo removal goes from scary to straightforward. Here’s exactly what that looks like:
- Remove the mattress and loose gear first to reduce weight
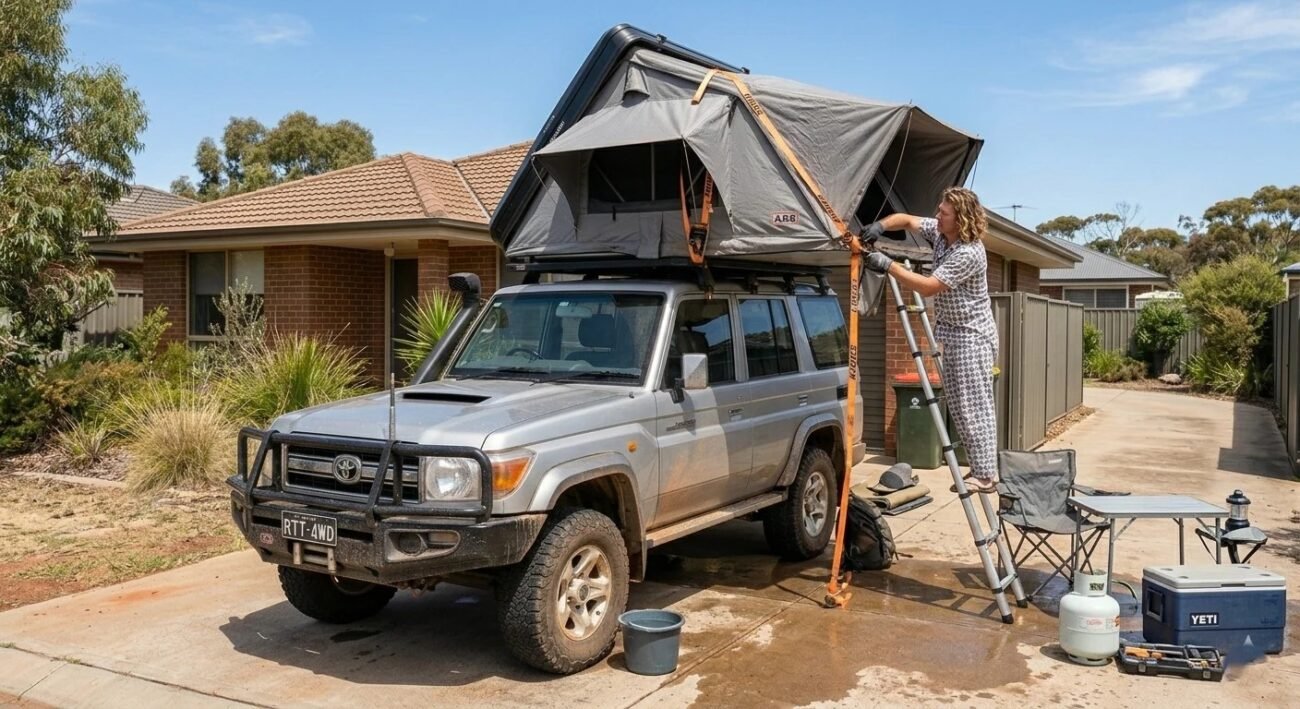
- Gather tools: ratchet straps, spanners, step ladder, moving blankets
- Loosen mounting bolts in sequence – don’t remove the last bolt without strap support
- Use ratchet straps to slowly lower the tent from roof to ground
- Protect your car’s roof with foam or moving blankets throughout
- Set the tent down on a flat, padded surface to protect the hinges and frame
This guide walks you through each of these steps in detail – tools you’ll need, common mistakes to avoid, and clever tricks to make the whole job faster every time.
Can You Really Remove a Roof Top Tent by Yourself? How?
Yes, you can. And honestly, most people overthink it before they even start. I’ve taken my own RTT off solo more times than I can count, and the first time is always the hardest, mostly because you’re working it out as you go. After that, it becomes routine.
The biggest concern people have is weight. Fair enough. A softshell tent like an Ironman 4×4 Easy-Out or Darche Panorama typically sits between 30 and 45 kg. A hardshell like the Rigdup 1.8m, iKamper Skycamp or 23Zero Armadillo can push 55 to 65 kg. That’s not light. But the weight becomes manageable when you break the job into stages rather than trying to muscle the whole thing off in one go.
The real skill is in the setup before you touch a single bolt. That preparation is what separates a smooth solo removal from a scratched roof and a sore back.
Here’s what makes solo removal actually doable:
- Strip the mattress, pillows, and any stored gear out first. This alone can cut 8 to 12 kg off the load.
- Use two ratchet straps looped over the tent and through the roof rack rails as a support system before the last bolt comes out.
- Have a clear, padded landing zone on the ground ready before you start.
- Work on flat, stable ground. Uneven surfaces make everything harder and riskier.
- A sturdy step ladder keeps you at the right height throughout the whole process.
Quick reality check by tent type:
| Tent Type | Avg Weight | Solo Removal Difficulty | Key Watch-Out |
|---|---|---|---|
| Softshell (canvas fold-out) | 30 to 45 kg | Moderate | Fabric and poles snagging |
| Hardshell (clamshell) | 45 to 65 kg | Harder | Centre of gravity shift when open |
| Rooftop swag style | 25 to 35 kg | Easiest | Low profile, easier to handle |
The one thing I’d stress from personal experience: never remove the final mounting bolt without your straps already holding the tent. That last bolt is the only thing stopping the tent from sliding, and if it goes without support, you’re in trouble fast. I learned that the hard way with a scratched rear quarter panel on my Prado. Not a fun afternoon.
It also helps to have a garage roof beam, a workshop engine hoist, or even a simple timber frame overhead if you’re removing it at home regularly. These aren’t essential, but they make the whole job feel easy rather than stressful.
Solo removal is completely within reach for one person. The right prep, the right tools, and a calm, methodical approach is all it takes.
What Tools Do You Need Before You Start?
Having the right tools ready makes the difference between a smooth job and a frustrating one. You don’t need specialist gear. Most of this is already sitting in your garage.
| Tool | What It’s Used For | Approx. AUD Price |
|---|---|---|
| Ratchet strap set x2 | Supports tent weight before last bolt removal | $25 to $45 |
| 3/8″ ratchet and socket set | Loosens mounting bolts and clamps | $40 to $80 |
| Step ladder 1.8m | Keeps you at safe working height | $60 to $120 |
| Moving blankets x2 | Protects roof paint and tent frame | $15 to $30 |
| Foam rubber mat | Cushions the ground landing zone | $20 to $40 |
| Adjustable wrench | Handles awkward bolt angles | $15 to $30 |
| Torque wrench | Re-torques bolts correctly when remounting | $45 to $90 |
| Nitrile gloves | Improves grip and protects hands | $10 to $15 |
Lay everything out on a ground sheet before you climb up. Searching for tools mid-job wastes energy and breaks your focus. Having it all within arm’s reach keeps the process smooth from start to finish.
How Heavy Is a Roof Top Tent And Does It Matter?

Weight matters a lot when working solo. Most softshell tents sit between 30 and 45 kg. Hardshell models like the Rigdup 1.8m, iKamper Skycamp or 23Zero Armadillo X3 push 50 to 65 kg. That’s a serious load for one person to manage alone.
But raw weight isn’t the whole story. Weight distribution matters just as much. A tent balanced evenly across two roof rack rails is far easier to control. One sitting awkwardly off-centre shifts unexpectedly during removal. Centre of gravity also changes dramatically if a hardshell clamshell pops open mid-process.
For solo removal, anything under 40 kg is manageable with the right technique. Between 40 and 55 kg, you need straps and a controlled lowering method. Over 55 kg, a hoist or a second set of hands is genuinely the smarter choice.
Stripping the mattress, pillows, and stored gear before you start is the easiest weight reduction available. That alone can remove 8 to 12 kg from the load. Every kilogram you drop before lifting makes solo removal noticeably safer and less exhausting.
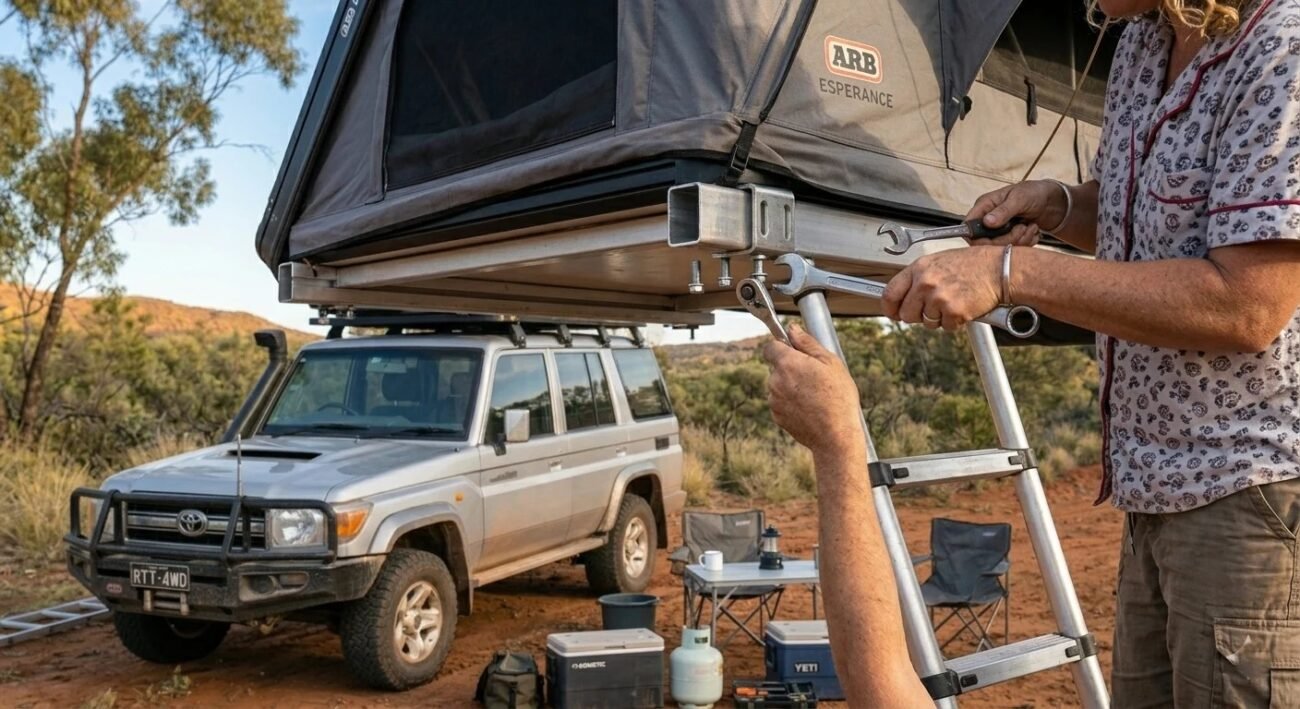
How Do You Safely Loosen the Mounting Bolts Solo?
Loosening bolts out of order is the fastest way to drop a tent. Work through this sequence every time.
- Strap the tent to the roof rack rails with two ratchet straps before touching any bolt.
- Identify your mounting system first. Australian setups commonly use T-track clamps, U-bolts, or direct bracket clamps.
- Loosen all bolts partially first. Do not fully remove any single bolt until all are loosened.
- Work diagonally across the tent. Front-left, rear-right, front-right, rear-left.
- Check ratchet strap tension is firm throughout. Straps should hold the tent weight fully.
- Remove three bolts completely, then pause before the final one.
- Confirm the tent is resting on the straps, not balancing on the rack rail edge.
- Only then remove the final bolt.
Rushing this step causes most solo removal accidents. Take your time. The strap system is your safety net throughout the entire process.
How Do You Lower the Tent Off the Roof Without Dropping It?
Lowering is the most physically demanding part of the whole job. A clear method prevents drops and injuries.
- Keep both ratchet straps attached with light tension as you begin lowering.
- Position your step ladder at the rear corner of the vehicle for the best control angle.
- Tilt the tent slightly toward the vehicle’s rear first. Use the vehicle as a natural guide rail.
- Release strap tension on one side slowly. Never release both straps at the same time.
- Let the tent slide down the rear of the vehicle rather than lifting it straight out.
- Drape a moving blanket over the tailgate or rear bumper as a slide buffer. This protects paint.
- Control the descent with both hands and your body weight throughout.
- Once the base contacts the ground, hold the top until the tent is fully stable.
- Step back and confirm balance before releasing your grip completely.
Having a foam mat ready on the ground before you start makes the final landing clean and controlled.
What’s the Safest Way to Rest It on the Ground?
Most people focus entirely on getting the tent off the roof. Very few think about where it goes once it’s down.
- Choose a flat, level surface. Uneven ground causes the tent to tip or rock after landing.
- Lay foam matting or folded moving blankets down before the tent reaches ground level.
- Rest the tent on its base frame only. Never land it on the hinge side.
- For softshell tents, fold the canvas down loosely before laying flat. This protects fabric from scuffing.
- Keep the ladder folded in or pointing upward. Never let the ladder rungs bear the tent’s full weight.
- For side storage, use a purpose-built cradle or rubber blocks under the frame corners.
- Never lean the tent unsupported against a wall. A shifting 45 kg tent causes serious damage fast.
- Cover with a tarp if the tent is staying off the vehicle for more than a day outdoors.
Planning the landing zone takes two minutes. It prevents hinge damage, frame warping, and unnecessary repair costs later.
Should You Remove the Mattress First to Cut the Weight?
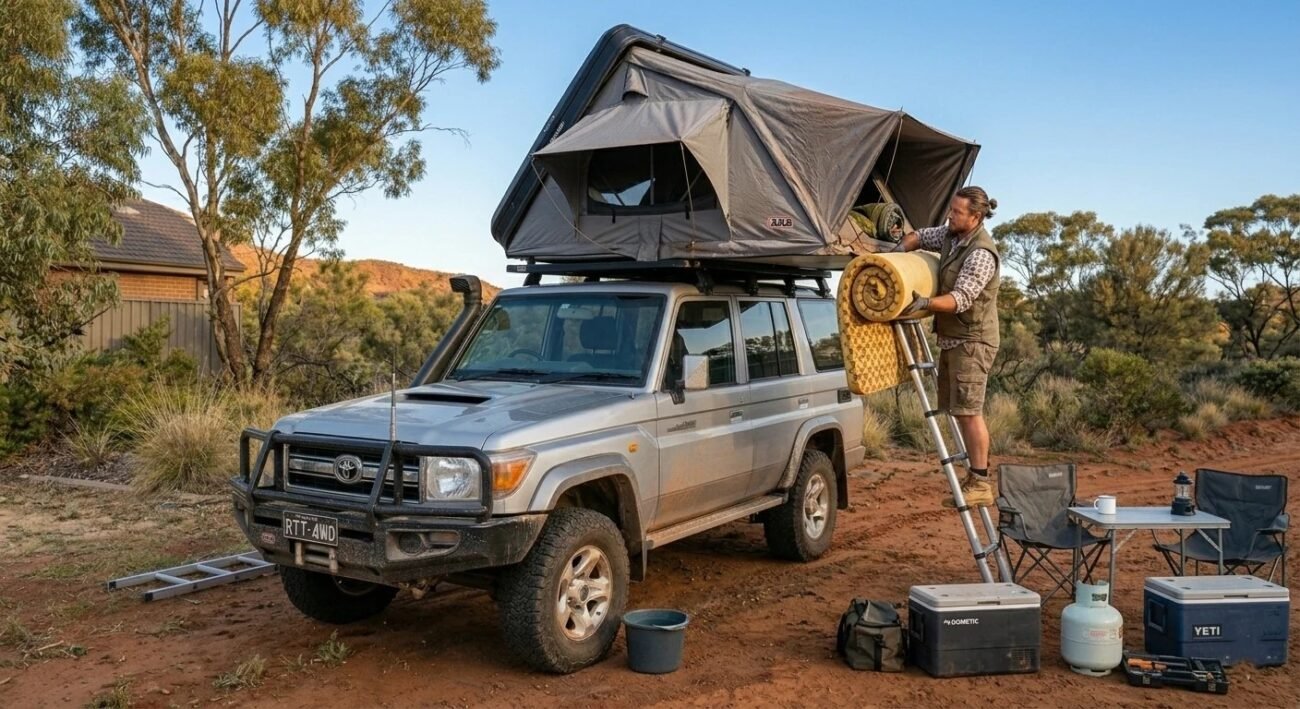
Yes, always remove it first. It’s the single most effective weight reduction before attempting solo removal. Most RTT mattresses weigh between 8 and 15 kg on their own. High-density foam in hardshell models like the Bunker 4WD or Tentco range can push that even higher.
Beyond pure weight, the mattress raises the tent’s centre of gravity. That makes the whole tent feel top-heavy and harder to control on the way down. Removing it lowers the balance point and makes handling noticeably more predictable.
Pull out everything else stored inside the tent too. Pillows, sleeping bags, lighting rigs, and camp gear add up fast. I’ve pulled close to 18 kg of extras out before a solo removal before. That difference is immediately obvious once you start lowering.
Open the tent fully, pull the mattress from the base, roll it up, and store it in the vehicle. Then close the tent again before starting removal. That ten-minute step makes the whole process safer and far less physically demanding when working alone.
Does a Hardshell Tent Come Off Differently Than a Softshell?
Yes, and knowing the difference helps you prepare correctly for your specific setup.
| Factor | Hardshell Tent | Softshell Tent |
|---|---|---|
| Average weight | 45 to 65 kg | 30 to 45 kg |
| Shape during removal | Rigid, fixed shape throughout | Can be folded flat to reduce bulk |
| Centre of gravity | Higher and less stable | Lower and easier to manage |
| Main solo risk | Clamshell opening accidentally mid-removal | Canvas and poles snagging on rack rails |
| Common mounting system | T-track or direct clamp bracket | T-track or crossbar clamp |
| Strap placement | Over the shell top with wide spread | Through ladder mount or base rail |
| Solo removal difficulty | Harder, needs thorough prep | More forgiving with minor adjustments |
| Correct landing position | Base frame down with shell locked closed | Folded flat with base frame down |
The core difference is control. A hardshell moves as one solid, rigid unit. When it shifts, it shifts with real force. A softshell is lighter and more flexible, but loose fabric and poles can snag unexpectedly on rack edges.
Always lock your hardshell closed firmly before starting removal. Check the latch twice before loosening a single bolt. You can more details differences between Hardshell & Softshell here.
Can a Roof Rack Trolley or Engine Hoist Make This Easier?

Absolutely yes. If you’re removing your RTT solo more than a couple of times a year, a hoist or trolley changes everything. It removes the physical risk almost entirely.
A standard workshop engine hoist, like the Kincrome K080013 or Supercheap Auto 2-tonne crane, works brilliantly in a home garage. Loop heavy-duty lifting straps under the tent’s base frame. Crank the hoist slowly and let it carry the full load. Your job becomes guiding the tent sideways off the rack, not lifting it.
A rooftop tent removal trolley is another solid option. The Front Runner Roof Tent Installation Stand is purpose-built for this job. It rolls under the vehicle, lifts the tent off the rack, and lets you wheel it straight into storage. Clean, safe, and genuinely fast once you’ve used it twice.
For a DIY approach, a timber A-frame with a harbour freight pulley system costs under $80 to build. Plenty of Aussie overlanders run exactly this setup in their shed. It’s not glamorous, but it works every single time.
How Do You Protect Your Car’s Roof and Paint During Removal?
Paint damage during removal is avoidable. It only happens when people skip the prep steps.
- Step 1: Lay moving blankets flat across your entire roof before touching any tools. Cover the rack rails and roof panel edges too.
- Step 2: Wrap foam pipe insulation around each roof rack crossbar. This prevents metal-on-metal contact if the tent slides unexpectedly.
- Step 3: Place a folded moving blanket over your tailgate or rear bumper before lowering begins. The tent will slide across this surface on the way down.
- Step 4: Check for protruding bolt heads or sharp clamp edges along the rack rails. Tape over anything that could catch the tent or scratch the roof.
- Step 5: Keep a microfibre cloth in your pocket throughout. Wipe down any grit or debris from contact points before the tent slides across them.
- Step 6: Once the tent is off, inspect your roof immediately. Catching a fresh scratch early means a simple polish fix. Leaving it risks rust on bare metal.
What Do You Do With the Tent Once It’s Off?
Getting it off the vehicle is only half the job. Storing it properly protects your investment.
- Stand it upright on its base frame if storing short-term in a garage or shed
- Keep hardshell tents fully latched and closed during storage to protect the seal
- Slide rubber blocks or foam pads under all four base frame corners to prevent moisture contact
- Cover the entire tent with a breathable canvas tarp, not plastic sheeting
- Plastic traps condensation, which leads to mould in the fabric and rust on the frame
- Store away from direct sunlight if possible. UV degrades canvas and plastic hardware fast
- Check the inside for moisture before closing the tent for long-term storage
- Leave a small sachet of silica gel inside a hardshell tent to absorb humidity
- Never store a softshell tent while the canvas is damp or even slightly wet
- Check ladder hinges and base bolts every few months during long storage periods
What Are the Most Common Mistakes People Make Removing Solo?
Most solo removal problems come from rushing or skipping preparation steps.
- Removing the final bolt before ratchet straps are fully supporting the tent’s weight
- Working on a sloped driveway instead of flat, level ground
- Not stripping the mattress and gear out first, making the tent unnecessarily heavy
- Using a wobbly or undersized ladder that shifts during the job
- Gripping the tent by the ladder instead of the base frame during lowering
- Forgetting to lock a hardshell clamshell before starting, causing it to pop open mid-removal
- No landing zone prepared, forcing a rushed drop onto bare concrete
- Releasing both ratchet straps at the same time during the lowering phase
- Rushing the bolt removal sequence instead of working diagonally across the tent
- Not checking roof rack rail condition before removal, missing cracked or loose clamps
Every mistake on this list is avoidable. Most of them cost less than five minutes to prevent properly.
How to Install a Roof Top Tent?
Installing a rooftop tent typically takes 45 minutes to 2 hours for a first-timer. An experienced setup takes 20 to 40 minutes. Removal follows the same logic in reverse, so times are comparable. Having your tools laid out and your rack measured correctly before you start cuts that time significantly.
Step 1: Confirm your roof rack’s weight rating. It must exceed your tent’s weight by at least 20 kg.
- Step 2: Measure the rack rail spread and match it to the tent’s base mounting points.
- Step 3: Lift the tent onto the rack with a second person or a workshop hoist.
- Step 4: Slide mounting clamps or T-track bolts into position along the rack rails.
- Step 5: Hand-tighten all bolts evenly before applying final torque. Work diagonally across the base.
- Step 6: Torque all bolts to the manufacturer’s specification. Most RTTs require 20 to 25 Nm.
- Step 7: Open the tent fully, check for level, and confirm no movement on the rack.
For a full breakdown of the installation process, [check out our detailed roof top tent installation guide here].
Any Tips to Make the Next Removal Even Faster and Easier?

A few small upgrades and habits turn a two-hour job into a twenty-minute one.
- Upgrade to quick-release T-track clamps. Brands like Front Runner and Rhino-Rack offer lever-release options
- Mark each bolt’s correct torque position with a paint pen after installation. You’ll see instantly if anything has moved
- Keep a dedicated removal kit bag packed and stored in your garage. Include straps, sockets, gloves, and blankets
- Take a photo of your mounting setup before removal. Use it as a reference when reinstalling
- Build or buy a permanent storage stand for your tent. Saves time hunting for safe storage spots
- Practice the strap setup once before your next trip so it becomes automatic
- Note which bolts on your specific rack are awkward to access. Pre-position your tools before climbing up
- Consider a Goose Gear or Eezi-Awn quick-mount system if you remove the tent frequently through the year
Final Thoughts
Taking a rooftop tent off by yourself is completely doable. You don’t need a second person or a fancy setup. You just need the right steps in the right order.
Strip the mattress and gear out first. Use ratchet straps before touching the final bolt. Prep your landing zone before you start. Work diagonally across the bolts. Control the descent with straps, not just your hands. That’s really the whole method.
The first solo removal always feels the hardest. The second time, you’ll wonder what you were worried about. By the third time, you’ll have a system that takes under 30 minutes from start to finish.
If you’re removing your RTT more than twice a year, it’s worth investing in quick-release clamps or a dedicated storage trolley. That small upgrade pays for itself in time and stress saved very quickly.
FAQs
es, one person can do it safely with the right method. Strip the tent of all gear first. Use ratchet straps to support the weight before removing the final bolt. Control the descent slowly. Most tents under 45 kg are manageable solo with proper preparation and a step ladder.
Lightweight softshell tents are the easiest to remove solo. The Darche Panorama and Ironman 4×4 Easy-Out are popular Aussie options under 35 kg. Rooftop swag-style tents are even lighter. Hardshell tents over 55 kg are technically possible solo but genuinely benefit from a hoist.
No, you don’t remove the rack. You only remove the clamps or bolts that connect the tent’s base frame to the rack rails. The rack itself stays bolted to the vehicle throughout the entire process.